How to generate content with WiseWriter
Hello everyone! Here WiseWriter team, today we are going to show you how to use our tool to generate content for your websites.
Registering Your Website
Firstly, to generate content in WiseWriter, you have two ways to do it:
- Register your website (currently, we can integrate with WordPress, but we are working to increase integrations with other CMS)
- Create a new project
Creating a new project gives you the possibility to generate content freely and then easily transfer it to any of your integrations. Alternatively, if you want to integrate directly with your CMS, you will have the ability to view all the posts you have published and perform certain actions on them (Write new content for your articles, generate titles and meta descriptions optimized for SEO, or categorize them). Additionally, if you add the connection with Search Console, you will be able to see all the data related to your website on the same platform, as well as use this data to curate content from it.
In addition to registering your website, you will need to provide at least one OpenAI API key to perform content creation actions. You can do this in your profile section 'Credentials'.
How to Register a Website?
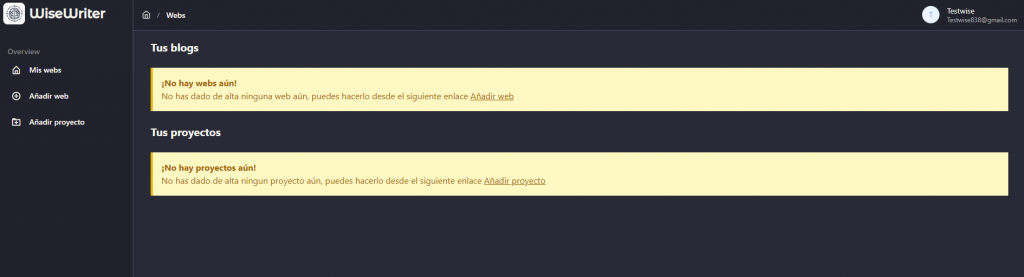
Registering a website in WiseWriter is very simple. First, you need to go to the 'Add website' section, which you can find on the Home page or in your 'My Websites' section.
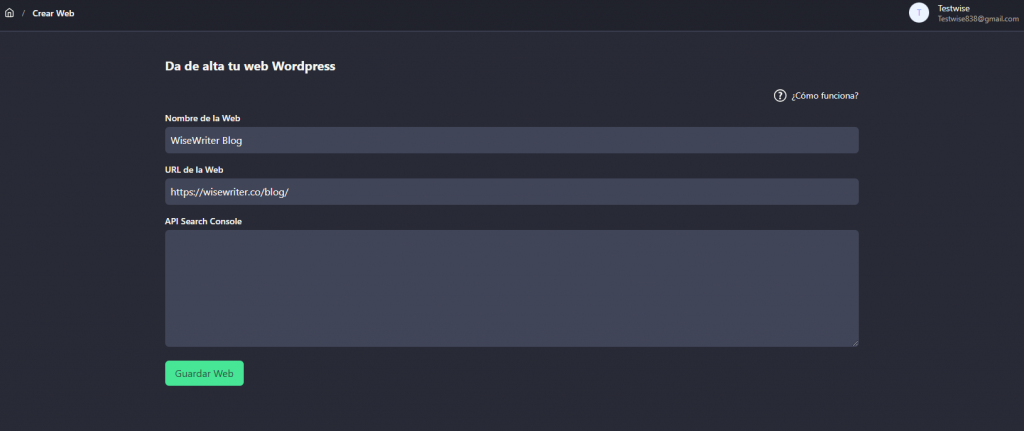
In this section, you need to enter the name of your website (you can choose any name), the URL of your website (for example, https://example.com) and if you want to connect with your Search Console data, the content of your Search Console API JSON (to see an example of how to get this JSON, you can visit the following link Search Console API Tutorial).
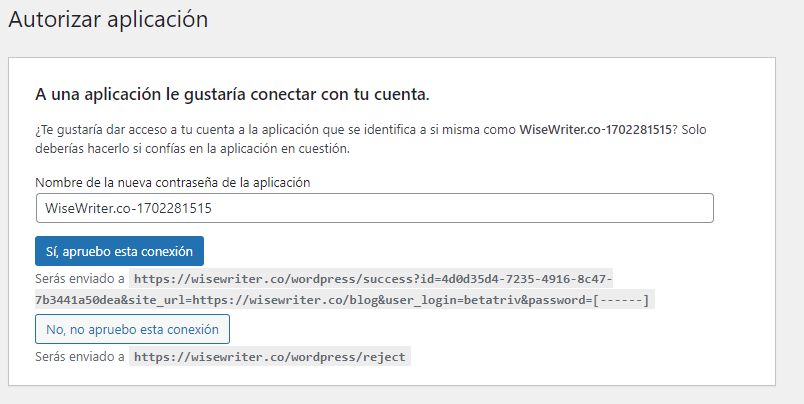
After saving the website, you will be redirected to the administration panel of your WordPress (you may be asked to log in with your username and password). Once you access the panel, you will be asked to authorize the platform to interact with your WordPress (Create or Update posts).
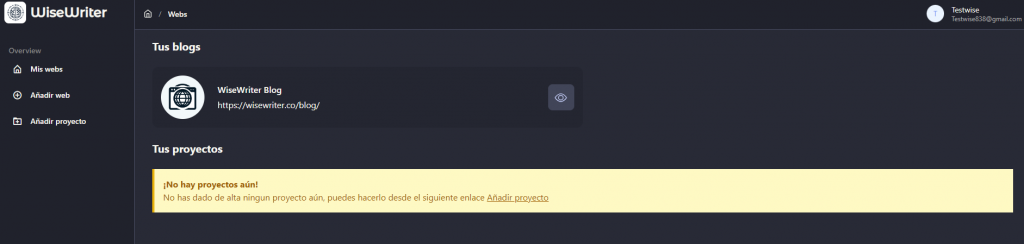
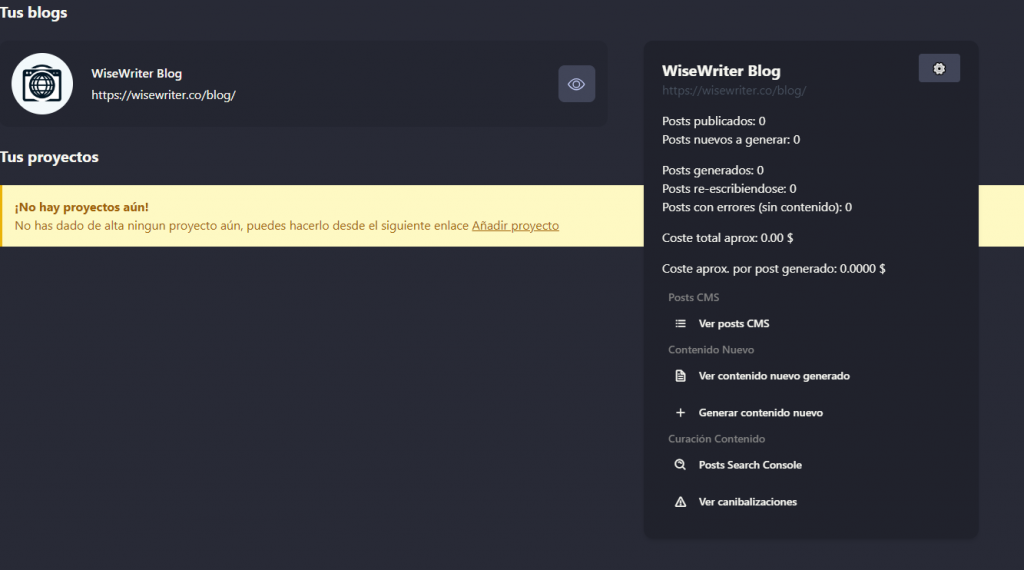
Once the connection is accepted, in your 'My Websites' section, you will see the integration with your website:
How to Generate Content for Articles Already Published in My CMS?
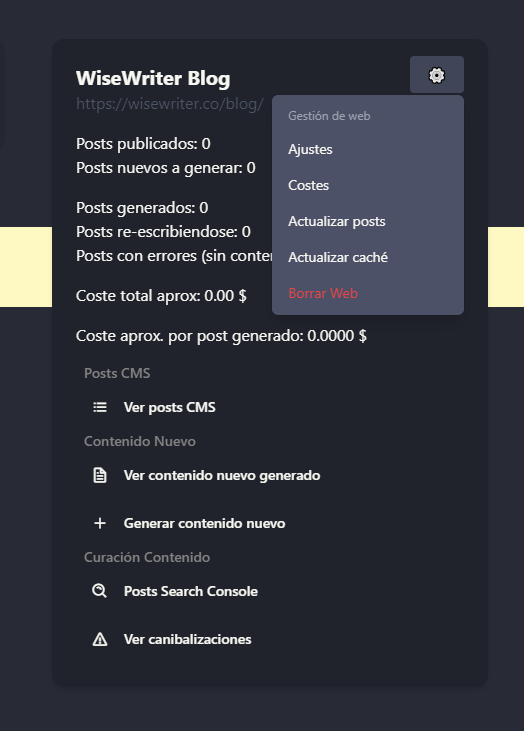
Here you will have a dashboard (click on the eye icon) where you can see all the data associated with your website and the different sections related to it.
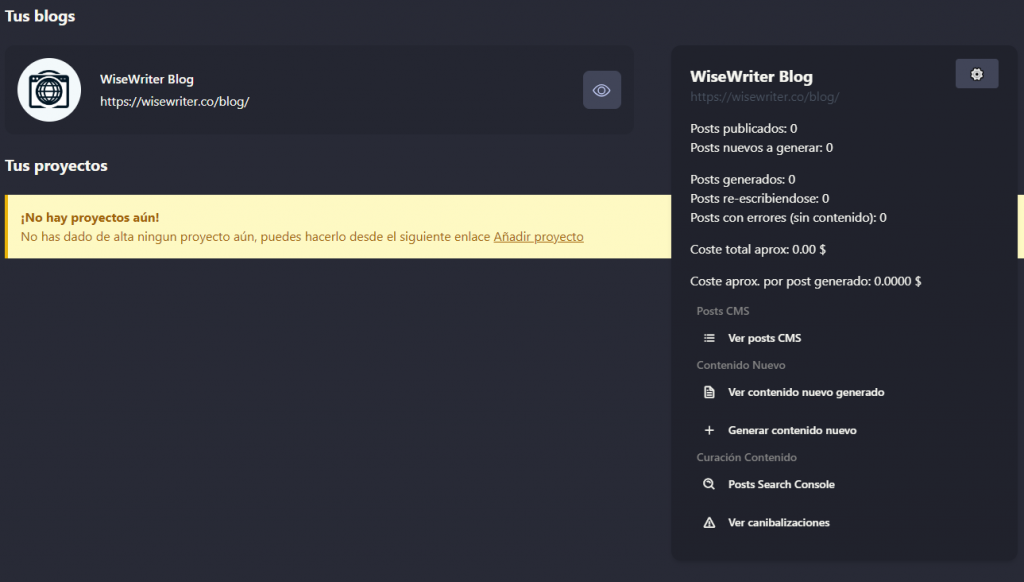
We can see three different sections:
- CMS Posts: This is where the posts already published on your WordPress will be listed
- New Content: This is where you can add and manage the new content you generate for your WordPress
- Content Curation: This is where, if you have registered your Search Console API data, you can carry out content curation based on the best-positioned content of your website.
In this case, we will focus on the 'View CMS Posts' option, where we will see a list of articles already published in our CMS.
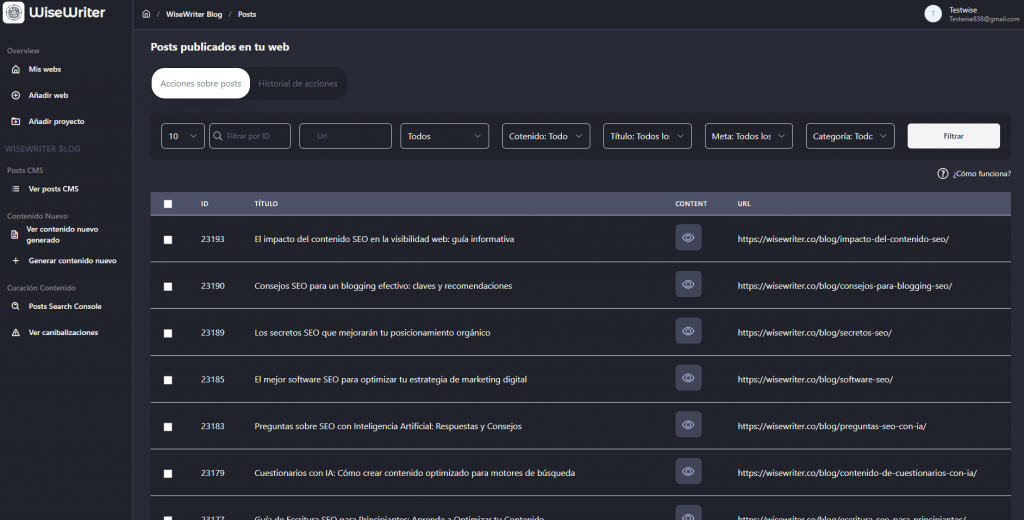
On these posts, we can perform various actions. Simply by clicking on one of them, the options bar will be displayed, allowing us to select them.
As can be seen in the previous image, on a previously published post, we can:
- Generate Content
- Generate a Title
- Generate a Meta Description
- Generate a Category
Generate Content
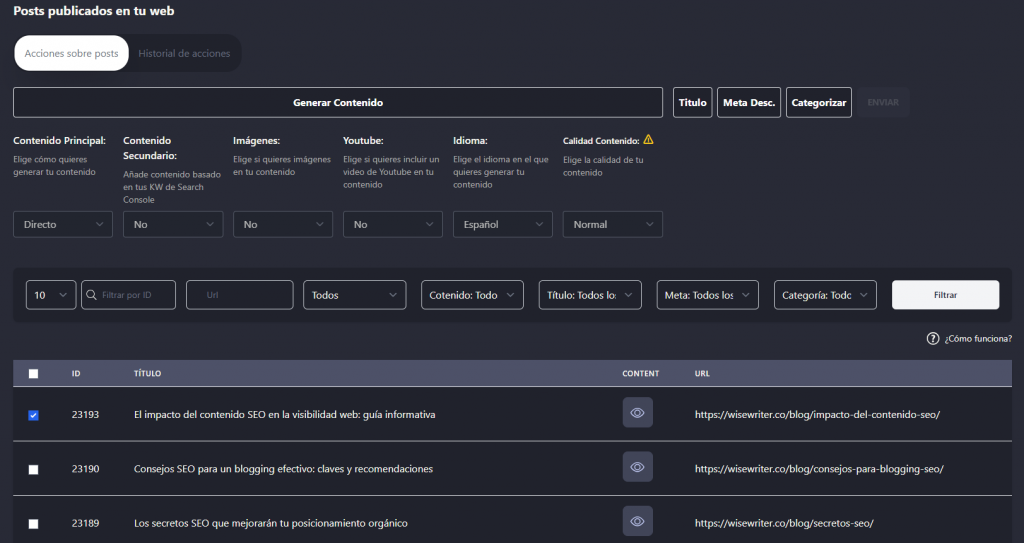
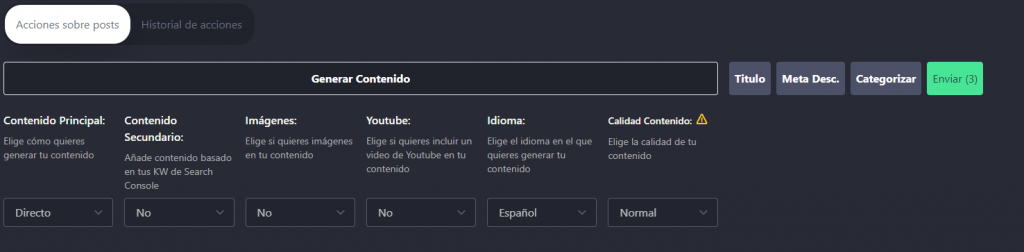
To generate content for our article, we will have to click on the 'Generate Content' button, and we can select different options:
- 🖋️ Main Content: Choose how you want to generate your main content. You can choose between Direct, SERP, or Youtube.
- Direct: The AI will be asked to develop content based on your keyword directly without context.
- SERP: It will scrape the selected number of results from Google's SERPs and pass it as context to the AI to generate content (You will need to provide a SERPS search API key).
- Youtube: You will have the option to choose a YouTube video or let us find the best YouTube video for your keyword and pass it as context to the AI.
- 📝 Secondary Content: Add additional content based on your Search Console keywords (You will need to provide your SC credentials in your website's data).
- 🖼️ Images: Decide if you want to include images and what type, taken from Google's SERPs (with copyright) or from Pexels, a copyright-free image bank.
- ▶️ YouTube: Include a YouTube video if desired at the end of your content.
- 💬 Language: Select the language in which you want to generate your content.
- ✨ Content Quality: Choose the content quality you want to generate. Optimal quality uses gpt-4, so the cost of content will be much higher (almost x10) – use it with caution!
Generate Title, Meta Description, and Category
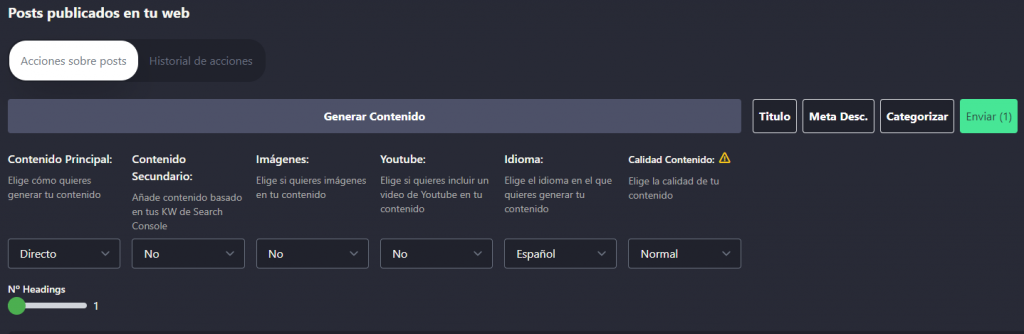
To generate the title, meta description, and category, simply click on the corresponding buttons:
Once we have selected the actions we want to take, we just need to click 'Submit' to send them to the processing queue. It is worth noting that we can perform these actions on an individual post or in bulk by selecting multiple posts at once.
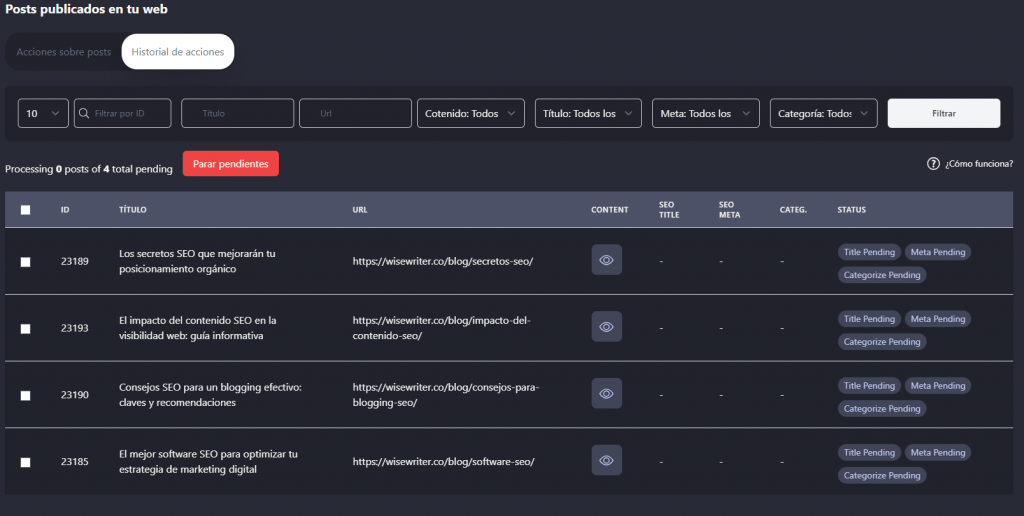
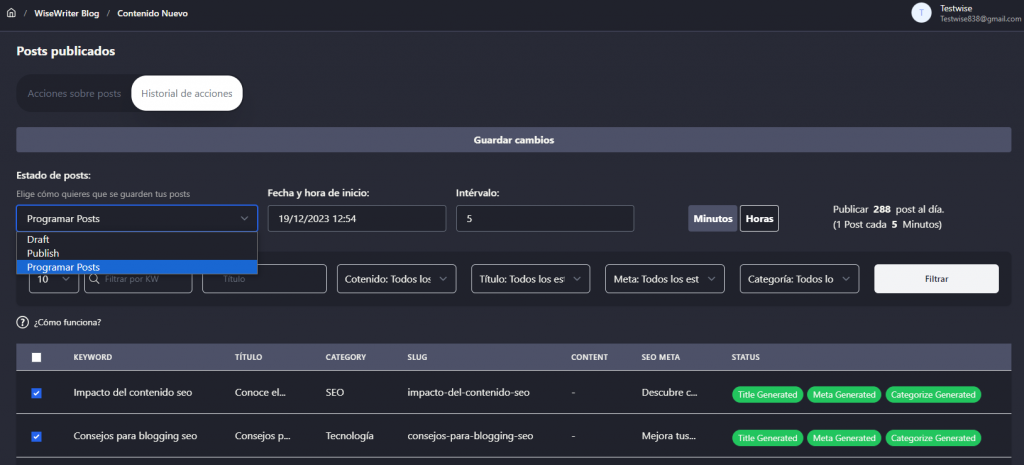
Automatically, it will redirect to the 'Action History' tab, where we can see the status of actions on various posts:
When these actions have been performed, we can see them in the 'Generated' state:
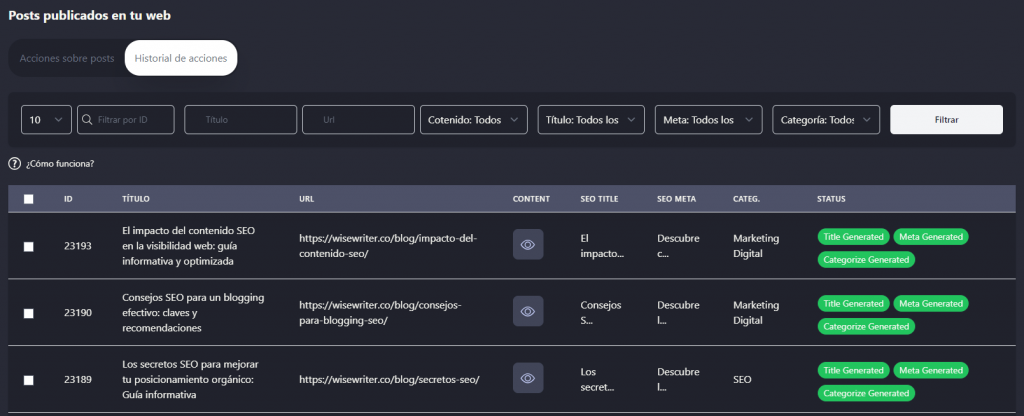
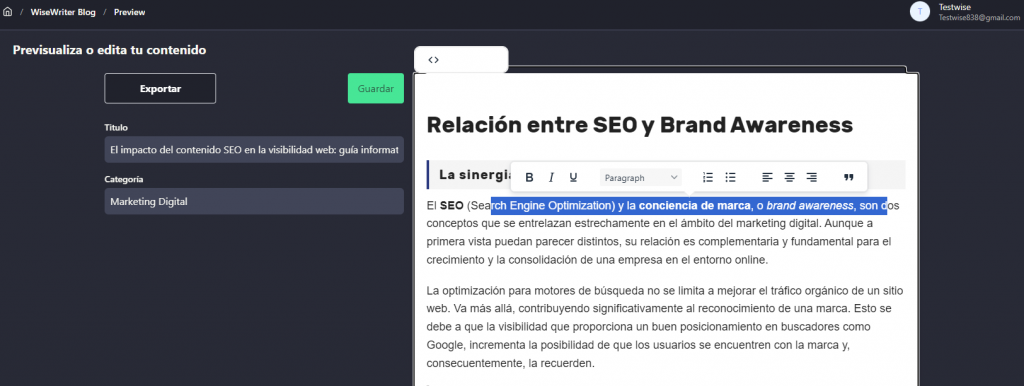
In this same tab, we can view the different generated elements: content, titles, metadata, and categories (to view the generated content, we can click on the eye icon, which will take us to the content viewer):
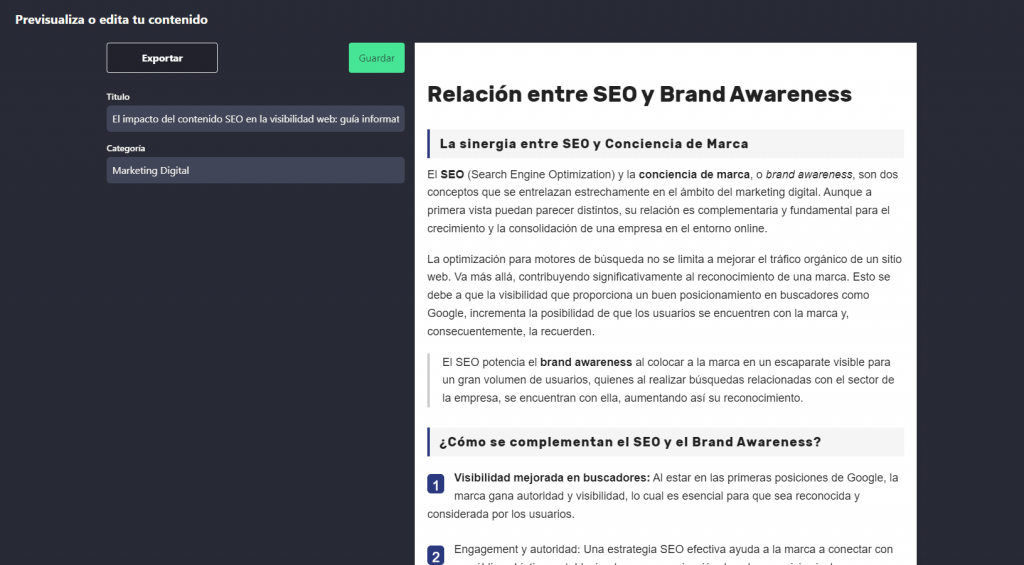
In this same section, we can edit the generated content to our liking using the platform's editor:
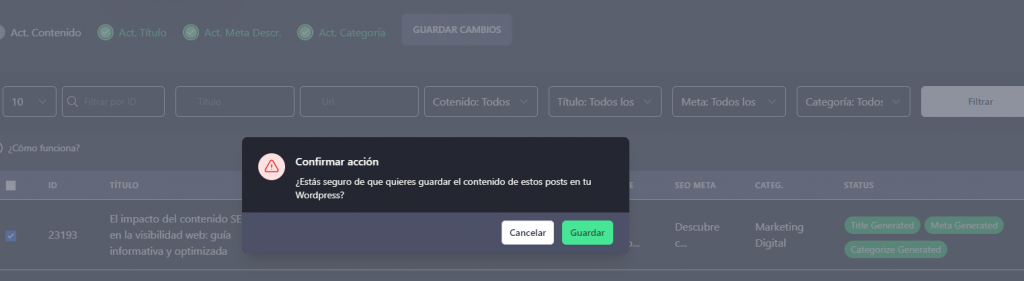
Returning to the 'Action History' tab, we can select any of the posts, and the available options for updating our post in our CMS will appear:
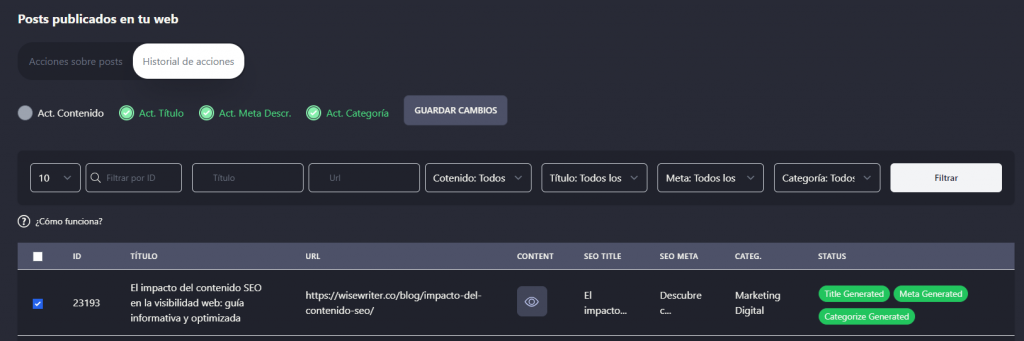
This way, we can update:
- The content of the Post
- Its title
- Its Meta Description
- Its Category
When saving the changes, these elements will be automatically updated in our CMS.
This is how we have been able to modify the content already generated in our CMS, as well as its characteristic elements.
Generate New Content
To generate new content for our CMS, we must follow steps very similar to those described earlier but with certain differences.
This time, we won't have a 'base' content to rely on for performing actions, so the first thing we need to do is import the new content we want to generate.
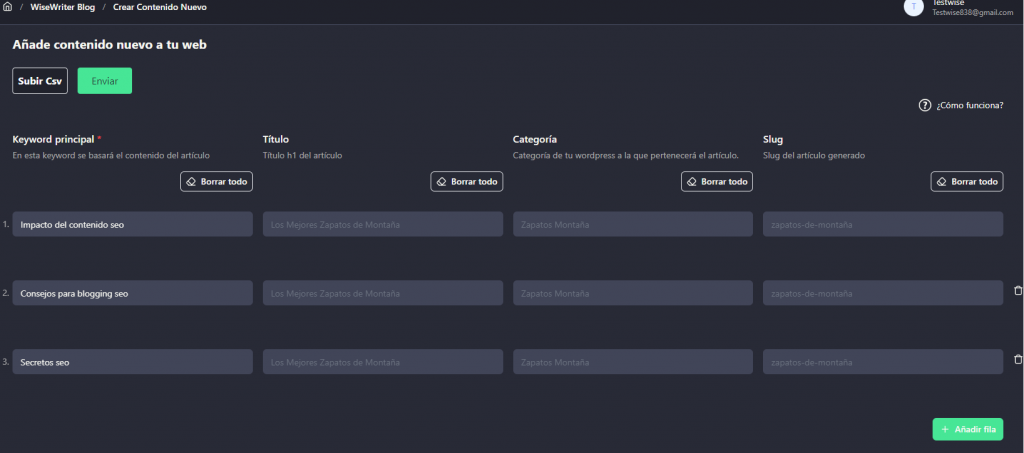
For this, we will go to the option in our menu 'Generate New Content'.

Here, we can import the new content we want to generate manually or in bulk.
To perform manual import, we need to fill out the presented form and add rows for each article we want to generate. The only essential element we must provide is the main keyword of the article (the rest can be added later or generated by the platform).
The other way to generate content is by uploading a .CSV file with the data we want to import. It's important to follow the appropriate column format for successful importation; you can consult the 'How Does It Work?' section for this.
Once we have filled out the form, we will click 'Submit', and this will automatically take us to the list of the content we have imported.
In our example, we want to generate 3 articles with the following keywords:
- Impact of SEO content
- Tips for SEO blogging
- SEO secrets
Clicking 'Submit' will take us to the list of the content we have just imported.
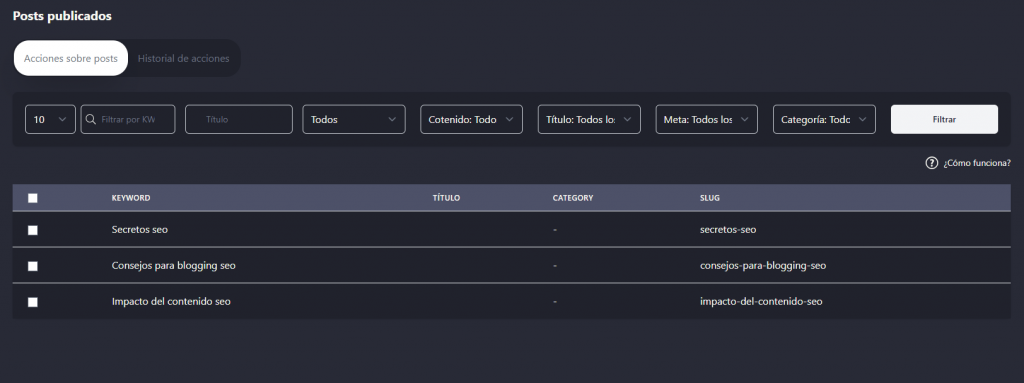
This is where we can perform various actions on the imported content, which are practically the same as when we generate content on already published posts in our CMS, except for the option of secondary content in the content generation action since there is no previously published content, and we don't have Search Console data to help improve the content.
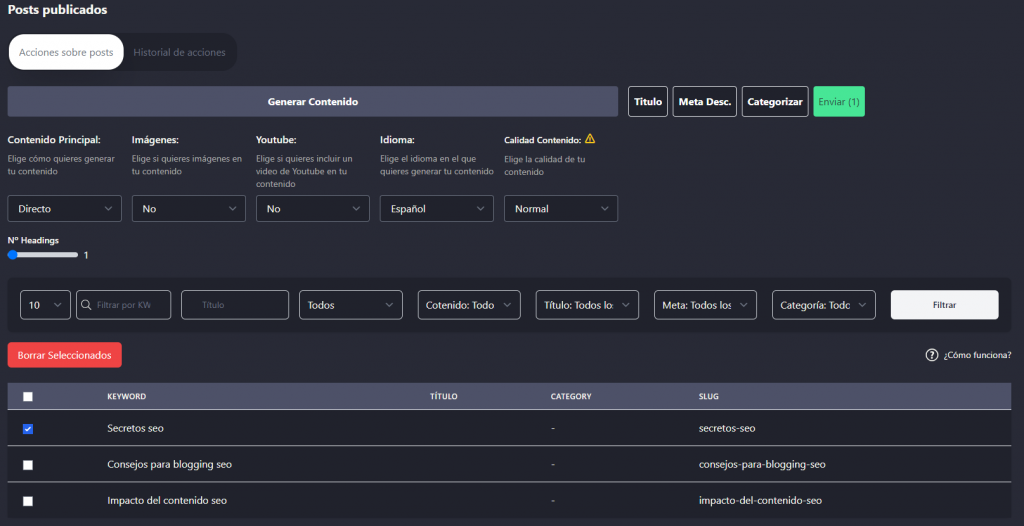
- 🖋️ Main Content: Choose how you want to generate your main content. You can choose between Direct, SERP, or YouTube.
- Direct: The AI will be asked to develop the content based on your keyword directly without context.
- SERP: The selected result number from Google SERPs will be scraped and provided as context to the AI for content generation (You will need to provide a SERPS search API key).
- YouTube: You will have the option to choose a YouTube video or let us find the best YouTube video for your keyword and provide it as context to the AI.
- 🖼️ Images: Decide if you want to include images and what type, whether from Google SERPs (with copyright) or from Pexels, a copyright-free image bank.
- ▶️ YouTube: Include a YouTube video if desired at the end of your content.
- 💬 Language: Select the language in which you want to generate your content.
- ✨ Content Quality: Choose the content quality you want to generate. Optimal quality uses gpt-4, so the content cost will be much higher (almost x10) – use it with caution!
The operation is the same as when performing actions on already published posts. If you have any doubts, you can go to that section to consult its operation.
Just like in the action history of already published posts, in the 'Action History' tab of the new content section, we can see the status of the actions taken on each article:
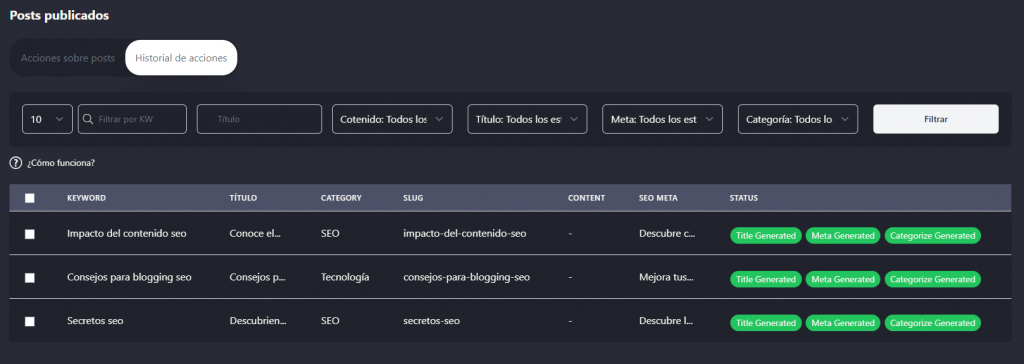
The difference here is that when clicking on any of the articles, the platform will now not give us options to update a previously published post in our CMS but will give us the options to create a new one. For this, it gives us the following alternatives:
Create the new articles as Draft, publish them immediately, or schedule them according to our preferences. Once the changes are saved, they will be imported into our CMS directly.
Content Curation
In the Content Curation section, we can see, on one hand, the list of Search Console data of the articles already published on our CMS and, on the other hand, the cannibalizations of the same.
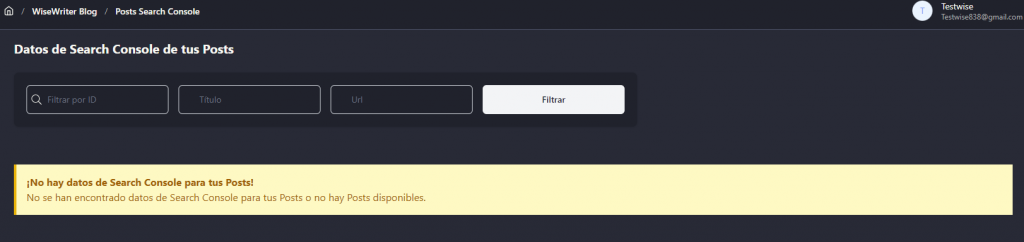
First, we'll talk about the 'Posts Search Console' section. Here, we can see all the data associated with our published posts that have had any impact on our Search Console.
It may happen that when accessing this section, there is no list even though you have updated the data of your Search Console API in your website's settings. In this case, you only need to go to your website's dashboard and click on 'Update Cache'.
With this process, you will be able to see the list with the Search Console data of your posts:
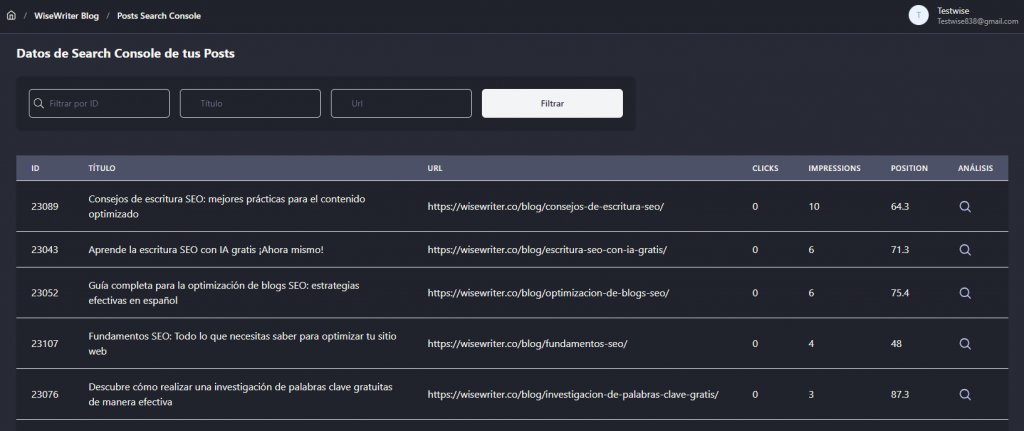
In addition to viewing our data, we will have access to the analysis option, where we can carry out content curation. For example, in our case, by clicking on the analysis of the first article, we get:
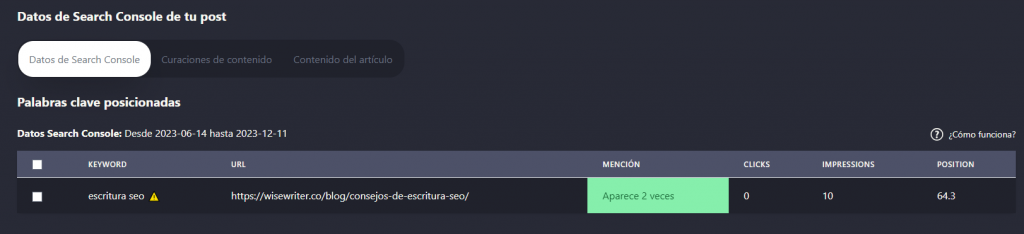
Here, we can see which keywords our article is ranking for.
Selecting one or more keywords will display the content curation panel:
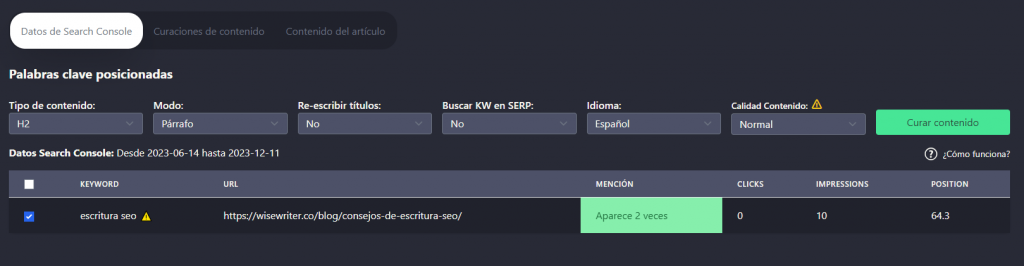
Here, we can choose how to carry out the curation of the selected keyword(s). For this, we have the following options:
- 🛠️ Different generation modes:
- 📜 Content type: Choose which content snippet you want to generate (H2, H3, H4).
- 🔄 Mode: Select what type of content you want to generate, list-type snippet, paragraph, or random mode (it will randomly choose between the two types of snippets, a good practice if you want to generate heterogeneous content for multiple keywords).
- ✨ Rewrite title: If you select 'No,' the heading of your content snippets will directly be the selected keyword, if you select 'Yes,' it will generate a heading with AI for the keyword in question (increases the cost of the snippet).
- 🔎 Search KW in SERP: Choose whether or not you want a prior search in Google SERPs to generate content about your keyword. This is a good practice to provide context to AI and improve content quality (this action increases the cost of the snippet, and you need to have a valid SERP search API).
- 🌐 Language: Select the language in which you want to generate your content curation.
- ⭐️ Content quality: Choose the quality in which you want to create your content curation. 'Optimal' quality will use the GPT-4 model, so the generation cost will be much higher. Use this option carefully.
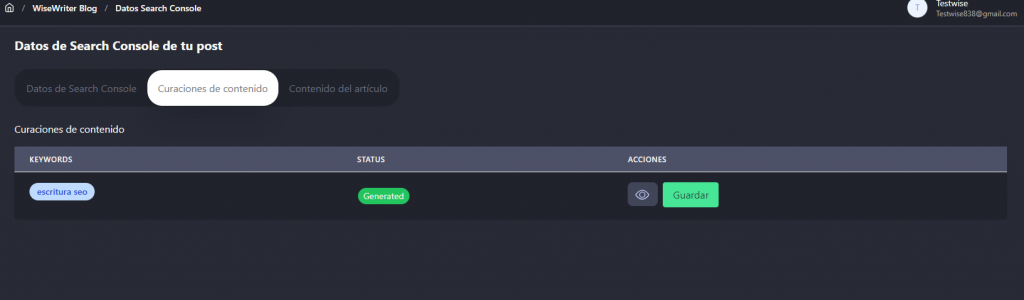
Clicking on content curation will automatically take us to the 'Content Curation' tab, where we can see the status of our curation:

Once generated, we can see the content generated for curation and save it in the content of our article (curation will always be saved at the end of the article). In the 'Article Content' section, we can check how our curation looks after saving and modify it to our liking.
Finally, it should be noted that if you want the new article content with the incorporated curation to be imported into our CMS, you should go to the 'Action History' section in the list of your previously published posts to perform the update process.
Si quieres conocer otros artículos parecidos a How to generate content with WiseWriter puedes visitar la categoría wisewriter how to.
Deja una respuesta